Confetti is my newest art quilt and I’d like to share the process of creating it, because it’s a new way of working for me.
This quilt grew out of my work at the Crow Barn last year, although it’s a completely new work–you can read about that experience here and here.
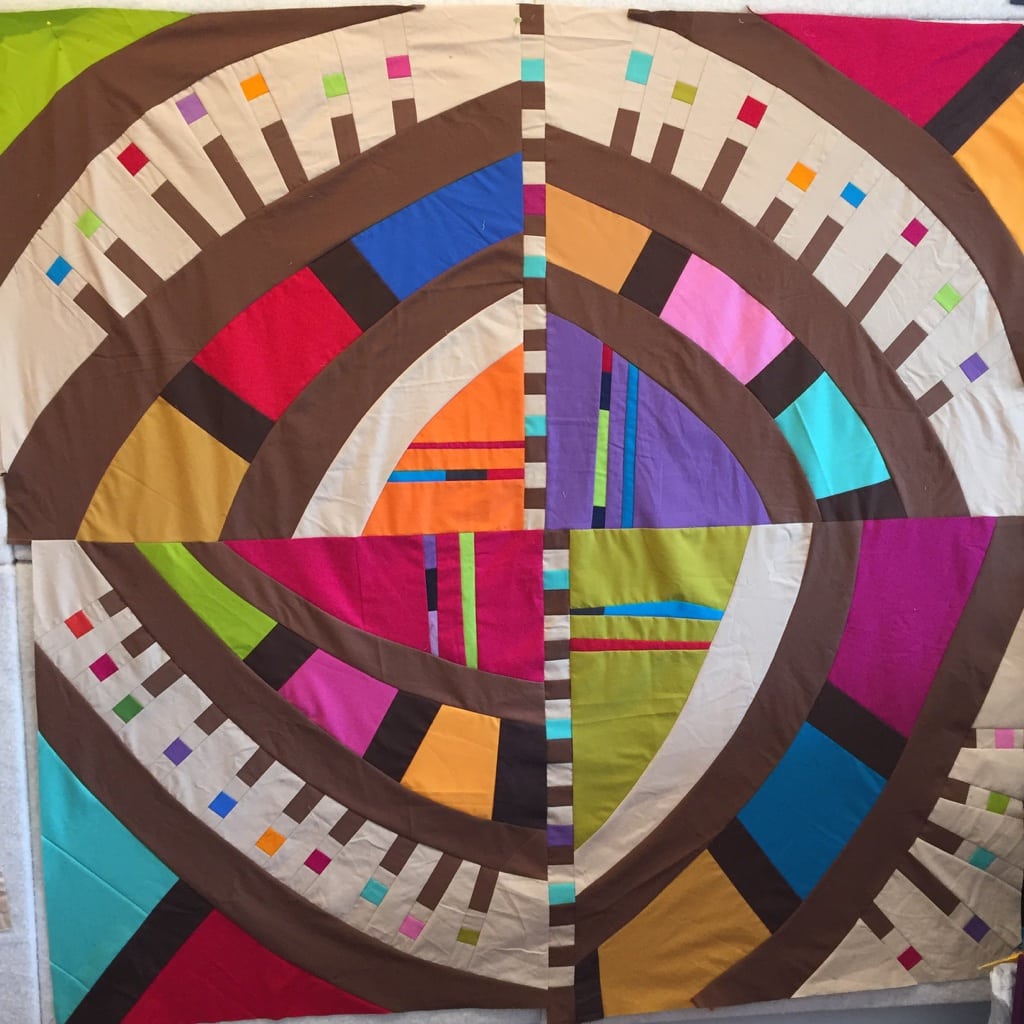
Confetti on the Design Wall – Cindy Grisdela
I’ve always been intrigued by curves, but usually they’re much smaller! Confetti finished at about 46″ square.
One of the things I enjoy about creating improvisationally is the fact that I never know exactly what the quilt will look like when I’m finished. It’s a little like putting a jigsaw puzzle together, but I get to decide what the picture will look like. Normally, I only make two decisions to begin–how big and what colors.
My design wall is constructed of pieces of insulation board that are each two feet square. So I decided to use an area for the design that was two squares high by two squares wide–48″ in total.
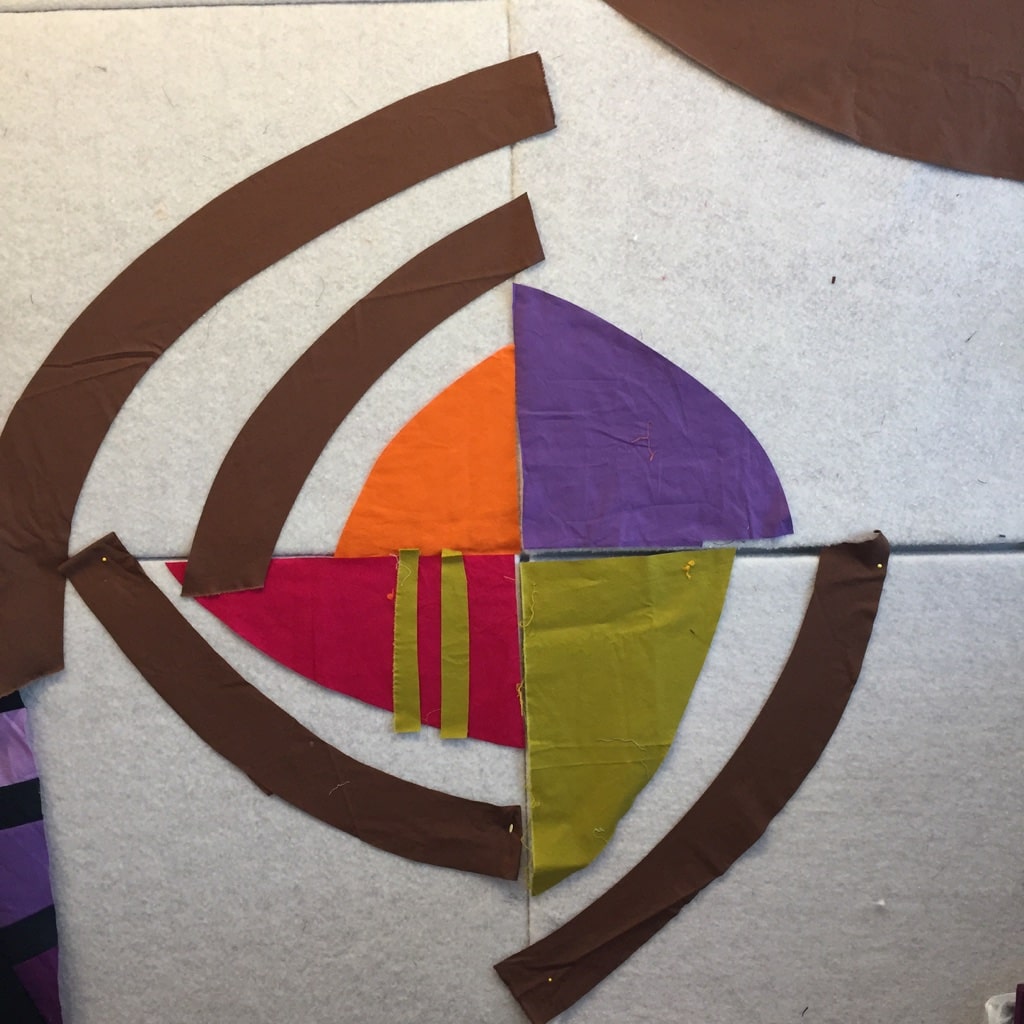
Color was the next step. I began with arcs again, but these would be chocolate brown instead of black. I wanted the colors to be strong and vibrant, so I started with the central quarter circles in purple, green, orange, and hot pink.
Confetti in Process–laying in color–Cindy Grisdela
For this design to work, I needed to lay in all the colors and make the design decisions before any seams were sewn. This is a major departure from my normal way of working, which is to create units of the design individually and sew them together, designing as I go.
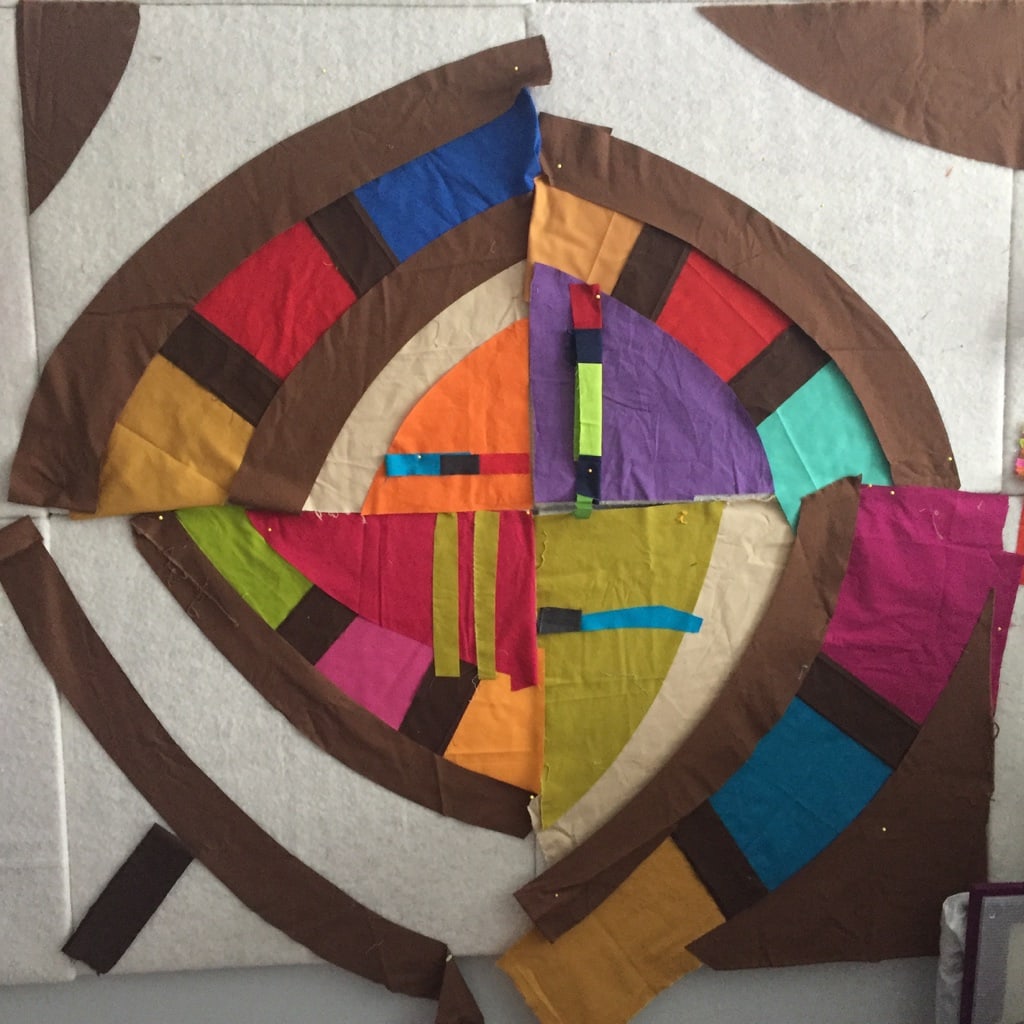
Again, I used the idea of color in the arcs separated by spines of a darker brown. Adding some dull gold values to the arcs helps to make the stronger colors pop. The stripes in the central quarters were mostly left over from a previous quilt and added some energy to those larger areas.
I cut the brown arcs freehand, then cut chunks of color to fill in the spaces with the spines. You can see in the images that the colors are just roughly laid in. It’s definitely not a pretty process!
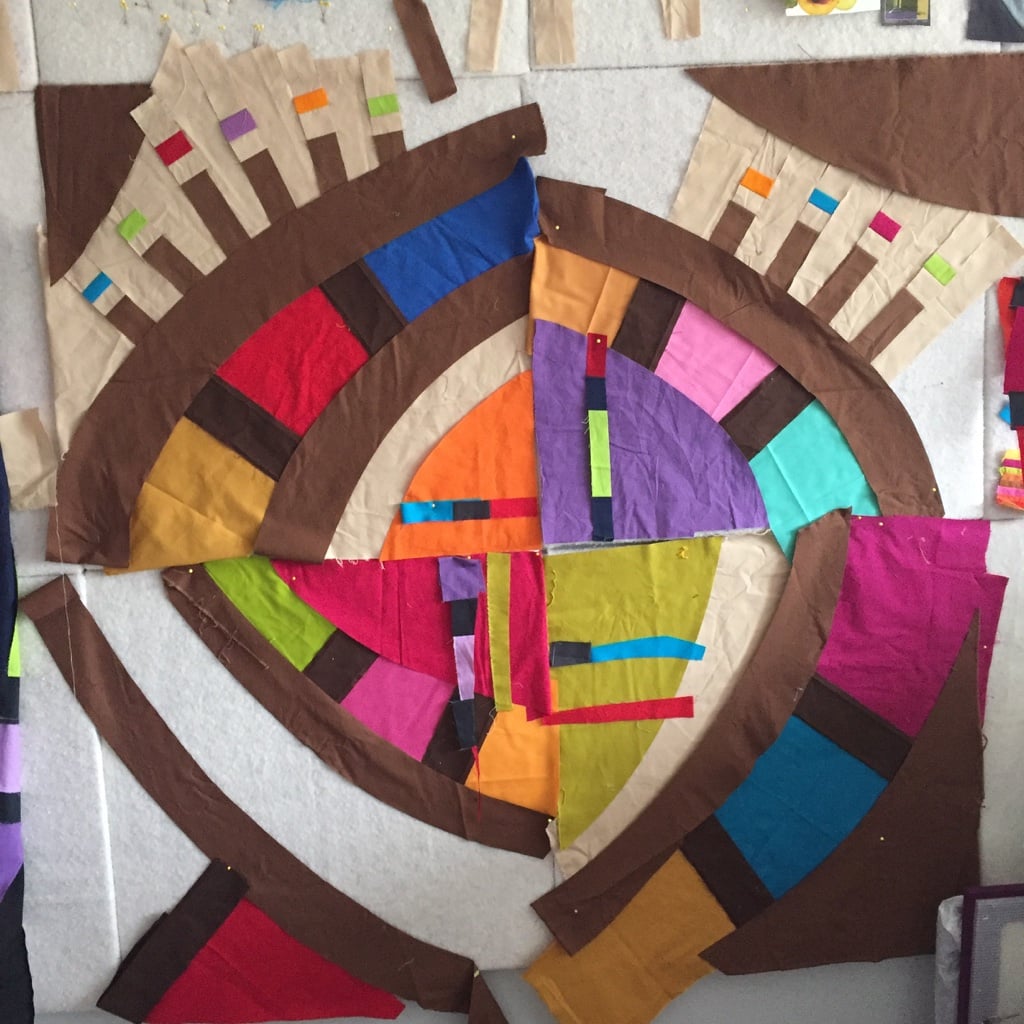
Confetti on the design wall–editing the colors–Cindy Grisdela
The confetti dots weren’t in my original design idea, but they added a lighter fell to the piece and once I started adding them in I was happy with the energy they created.
In these versions, you can see I initially planned to use brown in the four outer corners, but once the confetti dots were added in, it seemed a little dull. This is how the design changes as decisions are made–each one influences the next.
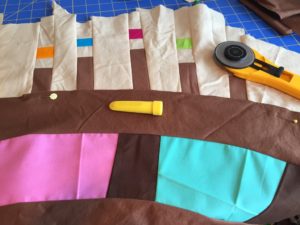
Constructing the seams of Confetti – Cindy Grisdela
Once the colors and lines were laid in, it was time to sew the seams together. I used a chalk marker to mark the lines for the seams, then pinned them and carefully transported the sections to my cutting board. I didn’t add seam allowances, but sewed the seam as it was marked on the design wall, so the final quilt ended up slightly smaller than the original design. In this type of improv work, the design itself is improvisational, but the actual construction needs to be fairly precise to make sure the lines end up where you want them to be.
Confetti top completed – Cindy Grisdela
I dealt with the dull brown corners by adding color to three corners and confetti dots to the lower right so they wouldn’t be symmetrical. The light areas are a khaki color, which opens up the design. I’ve only recently learned this–before last year I rarely used such light values in my work.
The vertical stripes in the center are an example of turning a problem into a design element. I sewed each quadrant together separately. When I came to the lower right quadrant–the last one to be sewn–it turned out about two inches smaller than the rest! I didn’t want to cut the rest of the piece down to fit, so I created stripes using the brown and khaki fabrics with a pop of aqua. I liked the effect of bringing the lighter value into the center, and it seemed to unify the design.
Because the composition was fairly complicated, I used simple vertical lines in the stitching.
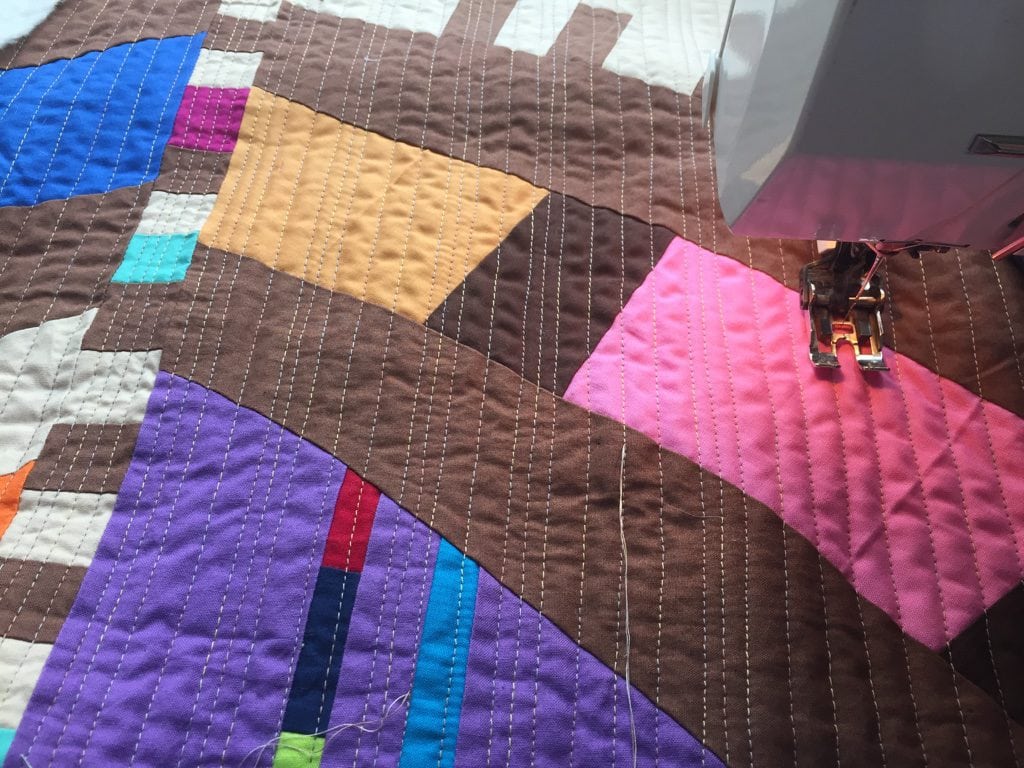
Stitching the texture – Cindy Grisdela
I hope to be able to exhibit this one soon! Maybe it will turn out to be the beginning of a series.
I love this quilt! Nice work and thanks for detailing the process. I would love to create like this, but am scared to start.
Thank you Carolyn! It is a little scary to start, but I always remind myself that I don’t have to know what it’s going to look like when it’s done, I just make a few decisions to begin and enjoy the process. It isn’t a quick process, and sometimes you have to let things marinate on the design wall until the way forward is clear.
Just wonderful. Thanks for the look into your process.
Thank you very much, Martha–I find it helps to talk through the process, especially when I want to start a series.
The piece is gorgeous! Thanks for sharing your process.
Thank you very much, Carol! I’m glad you enjoyed the process.
I love your description and can see how much work you put into this most beautiful quilt not using open seams. I am following you on Instagram.
Really beautiful piece, thanks for sharing the process, I love your work!
Thank you Peggy! I’m glad you enjoyed the process.
Thank you so much for your description on your process. Your choices if colors and design elements have created a beautiful quilt.
Thanks for your kind words about my quilt, Elizabeth.
I love the additions that were added to make your quarters the right size. Really adds an unexpected element!
Thanks for the feedback, Deborah–I like the way it turned out.
Fascinating new quilt and a look into a new process. Thanks!
Thanks Nancy–I did enjoy your city very much! I appreciate you sharing the idea of unique cities–I have been to San Francisco several times as well, and to New Orleans, but only once when I was a teenager. It’s on my list to go back sometime.